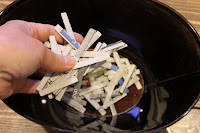
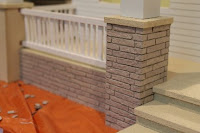
... except for the beginning is not much fun. Definitely no party. It does set the tone for the final outcome though, so pretty important. Starting is the hardest part and entails the most boring bits.
For those of you playing with the idea of putting together a dollhouse someday, there are some simple tips to follow which will affect the finished product.
Number one is this - plan it out first. Have a vision before you do more than open the box and think..."Wow..that's a lot of little pieces...." I find that visualizing what I want, and what steps it will take to get there, helps avoid problems and makes things go together faster once you do start. This also helps you figure out what supplies and tools you will require before you begin.
So....layout, design, colours, supplies & tools, even decor to a point for floor plans....check. I'd decided to go with household paint rather than crafters paint so it could handle a child's play and survive to be a decor & collectible piece as well. Means a little bit of playing about with thickness of the paint for some parts in order to keep fine enough to be in scale but that's doable.
With that in mind Kim and I headed over to our local Benjamin Moore store to pick up the paint so they'd be on hand when required. That was when the first (small) hiccup came. You would think this would be a simple task wouldn't you? Well, no. You see, those lovely Benjamin Moore colours that we finally settled on were not actual Benjamin Moore colours even though they are Benjamin Moore paints. I know - I thought that too ....???Excuse me?!? It seems that certain top interior designers aren't happy using the Benjamin Moore names and numbers when they recommend them for their projects - no, they have to give them their own 'special' names and numbers. Guess what? Small BC towns that are lucky enough to have Benjamin Moore stores don't get that particular information. So that was the first hurdle. The lovely and helpful lady who owns our local shop got on the phone long distance to Toronto to track down what those names/numbers actually were in Benjamin Moore language. A lot of work for a few pints of paint....dollhouses don't need gallons obviously. That was the next glitch, though a small one...small shops don't order in massive quantities of base tones in pint sized cans. Apparently not a lot of call for colour testers here. She was down to one can but at least that's all we required to start. So after being at the store for over 45 minutes, we came away with the soft grey base colour for the siding. She even ordered in the minimum 72 more pint sized cans which should be in by the time we're ready to proceed with the other 4 colours we'll need. Thankfully we were the only ones there at the time or I'd have felt bad at the amount of time she spent helping us get what we'd come in for.
It's a good thing to check out actual paint swatches as what you see and print off your computer may not be exactly as shown. I ended up going a tone lighter for the siding for a softer feel so may decide to change up the shade of white that will be used.
Anyway, if you are local and you're reading this...support our local Benjamin Moore store - they totally understand customer service!
That takes us to the next tip - following the directions that come with the kit...or not. For the most part I will. Real Good Toys has excellent directions - lots of pictures helps. You need to be familiar with all the parts and what they are and how and when they will all be stuck together. If you want to make life easier on yourself as well end up with a superior paint job, you need to think this through. You end up with a much nicer completed project if you paint as you go, instead of putting it all together and then painting. However, you can't paint where wood needs to be glued to wood or it won't have a strong bond.
Also, the first coat of paint needs to be a good quality primer coat. It seals the wood and fibre board so you end up with true colours as well as requiring less coats. Make sure you don't paint the ends or areas which will need to be glued.
Another important tip - it's very important to sand before you primer/paint and after each coat dries. That step is the big reason that getting started is not the fun part and you need to take a big breath, take things step by step, be patient and just get started. Don't be in a rush, let the paint dry it's recommended time and same with the glue. I'd recommend having a block of uninterrupted time to do this. Luckily I have this week off and it's raining.
With the planing in your head done it's time to gather up your Supplies and Tools. This is an important step to help keep your sense of humor.
You will need:
- various grades of sandpaper
- sharp pencils
- long metal ruler
- painting tape (strong but doesn't leave a residue)
- a couple of 1 inch, decent quality, edging paint brush
- clear plastic
- squares (Lego is wonderful)
- wood glue (** very important tip*** use a quality wood glue, not a crafting glue for a good strong bond)
- hammer and scrap wood
- xacto knife w/ sharp blades
- extendable clamps if you have them
- I also like to use plastic sandwich bags and rubber bands to seal up my paintbrushes between uses. That way you don't have to spend time cleaning them each time. Just throw them in the freezer like that if it's going to be more than a day or two between painting.
- If you have access to latex or nitrile gloves that fit well, bonus. It's guaranteed that your hands will get messy with the first steps.
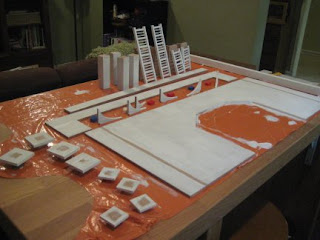
Set yourself up in an area that you can leave in a mess. I am lucky enough to have a workshop for cutting wood and a separate studio area for playing in. It's a nice bonus to have a large work table to spread out on with a tv to entertain you through the tedious boring bits. Lay a large garbage bag over top so you can glue (and paint) on a completely flat surface without being concerned with pieces sticking to the table.
Okay - so this is what has happened here over the last three days.
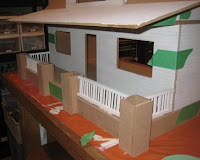
 Take any door, window & stairway cut outs and square off the corners. This is so much easier to do now rather than later. Figure out which pieces you'll be using first, give a light sand and then paint with primer. Let dry. **Notice the bits of green Paint Tape on the ends of the channel board for the porch railings?. This keeps paint away from where you'll need to glue them to the porch posts.
Then lightly sand all pieces to be primed. Then prime. This is a good time to wear those latex gloves.
One of the first considerations was which side I wanted the staircase to be on before priming the ceiling and leaving out the glue line for the front wall on the first floor. When flipping this you have to keep in mind where the cut out for the staircase is so you have enough room for the landing. Seems a simple thing but don't do it when you've been sipping on wine while you work.
 I glued together the foundation
at this point so it's ready when
it's time for the soft fit. Make
sure you use your squares for
this. You should double check
the fit of the first floor at this
point. Once I knew where the
foundation pieces would sit, I
wrote a quick To/From/When
on the bottom. Kind of difficult
thing to do as an afterthought.
Then after the primer dries comes more sanding....
....more gluing....
... then it gets exciting - you get to glue parts together!
Then more sanding.....lots and lots of sanding.
This is where the tv and wine comes in.
This is another thing I changed up a bit. I didn't like the heavy look of all the 1/4 inch wide balusters for the porch railing so decided to mix it up with some 1/8th square ones as well. This is where the kit is nice as they supply an excellent set up pattern. This tricky bit is made easier if you secure the paper pattern directly to the table and over lay with clear plastic. Sticky all these pieces together takes a bit of maneuvering and can get messy with the glue squishing out. It's very important to have a square to push against as you work on these. It's hard to see in this photo but the grey bit along the bottom and left hand side is my small square taped down over top of the plastic cover and aligned up against the pattern.
This is one of those parts where you need to be patient and aim for accuracy with the tight fitting bits. In this scale your eye will notice if something is 1/16th or even 1/32nd of an inch out.
Then it's back to figuring out glue lines and priming some more
parts so they are ready for the next stage.
That's enough for today though as we need
to let these parts dry before carrying on.


